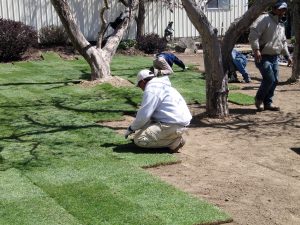
Cultivated turf allows you to enjoy a lawn of instant beauty and maturity without the usual time consuming maintenance of seeding.
The following are basic steps recommended for the Central Oregon region to create a successful, beautiful lawn.
STEP 1 – Measuring & Ordering
With a tape, measure the area of your planned lawn. Find the area with these simple calculations – measured to nearest feet.
Area of a CIRCLE Area = 3.14 x Radius squared
Area of a RECTANGLE Area = Length x Width
Area of a TRIANGLE Area = (Length x Width) divided by 2
Combination Free-Form Forms
Breakdown the free-form area to obvious forms and calculate each form’s area. Once each form is calculated, add the areas together to derive a total area.
Be sure to have your preparatory work completed before you order your turf. Prompt installation on the day of delivery is crucial to a strong beginning for your new lawn.
STEP 2 – Soil Preparation
If your ground is compacted, rototill to a depth of 3-4 inches. Remove all dirt clods, branches, and other debris. Rake smooth and level. To eliminate drainage problems, slope soil away from foundations, etc. If topsoil was placed on the area, use a roller 1/3 full of water and roll the area to firm up the soil. Watering the area thoroughly a couple of days prior to installation will help reveal these areas also. We do not recommend using pre-plant fertilizer unless it is rototilled or raked and watered into the soil. When using a pre-plant fertilizer we recommend using 4-5 lbs. per 1000 square feet of a well-balanced fertilizer (Pink, 16-16-16-7).
STEP 3 – Turf Installation
Install your lawn immediately upon delivery. Start water on your lawn within 30 minutes of installation. Turf is living plant material, it requires ground contact and moisture to survive. Begin installation along the longest straight line available, such as a sidewalk or a driveway. Push edges and ends against each other tightly, without stretching. Avoid gaps or overlaps. Stagger the joints in each row in a brick-like fashion. A knife with a serrated edge works very well to cut ends or trim edges.
STEP 4 – Watering
Give the entire area at least one inch of water within one half hour of installation. For the first week, water the area one inch every day.
During the second week, water one inch every other day. By the third week you may water as normal. Water one inch every 2 or 3 days.
Adjust watering schedules depending on the soil types, weather, and water availability. Be sure that your new lawn has enough moisture to survive hot, dry, or windy periods. Water areas near driveways, buildings and fences more often where reflected heat dries the turf quickly.
Complimentary watering gauges are available at McPheeters Turf for measuring water applied.
** Your new lawn will be ready to mow about one week after installation. Check a corner to make sure that the roots are attaching, set mower heights to about 2-2 1/2″ the first mowing.

